Managing Lower Back Pain During Pregnancy + Postpartum
Lower back pain affects is one of the most common complaints during pregnancy affecting up to 70% of pregnant women (1). While this discomfort can feel overwhelming, understanding its causes and implementing effective management strategies can provide significant relief and improve your quality of life during this exciting time.

Back Pain During Pregnancy
Pregnancy brings remarkable changes to your body, and several factors contribute to lower back pain:
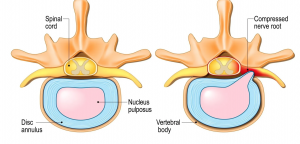
- Hormonal Changes: Your body produces relaxin, a hormone that loosens ligaments and joints in preparation for childbirth. While essential for delivery, this increased flexibility can reduce spinal stability and contribute to discomfort, especially through the pelvic and lower back.
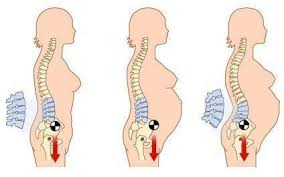
Pelvic changes through pregnancy - Postural Shifts: As your baby grows, your centre of gravity shifts forward, causing your pelvis to tilt and creating an increased curve in your lower back. This postural change places additional stress on your lumbar spine, hips and pelvis.
- Weight Gain: The additional weight you carry during pregnancy, particularly in your abdomen, increases the load on your spine and supporting muscles.
- Muscle Separation: Diastasis recti, or the separation of abdominal muscles, can occur during pregnancy, reducing core support for your spine.
- Sleep Disruption: Difficulty finding comfortable sleeping positions can lead to muscle tension and stiffness.
Postpartum Back Pain
Many women expect back pain to resolve immediately after delivery, but postpartum back pain is very common. The physical and hormonal changes during pregnancy can still cause discomfort postpartum. Plus the additional posture changes and feeding positions can hinder recovery. Contributing factors include:
- Weakened Core Muscles: Pregnancy stretches and weakens abdominal muscles, reducing spinal support.
- Breastfeeding Posture: Prolonged periods of nursing, often in awkward positions, can strain your upper and lower back.
- Carrying and Lifting: Constantly lifting your growing bub, along with car seats, strollers, and other baby gear, can stress your lower back.
- Sleep Deprivation: Interrupted sleep affects muscle recovery and pain perception.
- Hormonal Factors: If you’re breastfeeding, relaxin continues to affect your joints, maintaining increased flexibility that can contribute to instability. Relaxin can remain elevated for a few months, up to a year postpartum.
Management Strategies
During Pregnancy
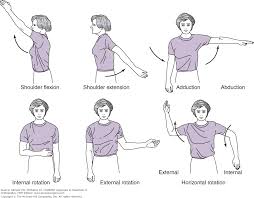
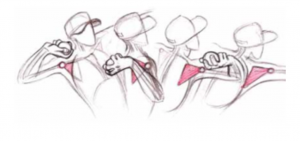
- Exercise and Movement: Gentle, pregnancy-safe exercises can strengthen supporting muscles and improve flexibility. Consider prenatal yoga, swimming, or walking. It is advised to consult with your healthcare provider before starting any exercise program.

Movement class for pregnancy - Proper Body Mechanics: Learn to lift with your legs, not your back. When getting out of bed, roll to your side first, then push up with your arms.
- Sleep Support: Use a pregnancy pillow between your knees and under your belly to maintain proper spinal alignment. Sleep on your side, preferably your left side.
- Supportive Footwear: Avoid high heels and choose shoes with good arch support to help maintain proper posture.
- Heat and Cold Therapy: Apply a warm compress to tense muscles or use cold therapy for acute pain, but avoid prolonged exposure and always protect your skin.
Postpartum Recovery
- Gradual Return to Activity: Your body needs time to heal. Start with gentle stretching and gradually increase activity levels we can help to see what is right and when.
- Core Rehabilitation: Focus on rebuilding your core strength with appropriate exercises.
- Ergonomic Adjustments: Create breastfeeding stations with proper support for your back and arms. Use a nursing pillow to bring your baby to breast level rather than hunching over.
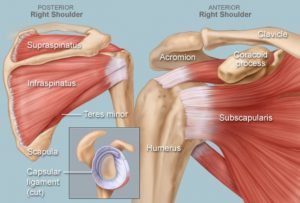
The Role of Chiropractic Care
Studies support that Chiropractic care offers safe, gentle treatment options for pregnancy and postpartum back pain (2). We use techniques specifically modified for expecting and new mothers. Treatment tables and pillows can be adjusted to accommodate your growing belly, and gentle, low-force techniques ensure safety for both you and your baby.
Here’s how we can help!
- Muscle Tension Relief: Soft tissue therapies can help relax tight muscles and improve mobility.
- Adjustments: Gentle adjustments can help restore mobility, address pelvic torsion and get you moving better.
- Education: We can provide guidance on proper posture and body mechanics for daily activities.
- Exercise Recommendations: Receive personalised exercise recommendations appropriate for your stage of pregnancy or recovery.
When to Seek Help
While some discomfort is normal as your body adapts to pregnancy and recovery, certain signs indicate it’s time to consult treatment:
- Pain that interferes with daily activities
- Worsening symptoms
- Referral pain down the legs
- Severe pelvic pain or difficulty walking
- Pain that interferes with return to exercise postpartum
- Sleep disruption
Final Thoughts
Lower back pain during pregnancy and postpartum doesn’t have to be something you simply endure. With proper understanding, safe management strategies, and appropriate professional care, you can find relief and continue to enjoy this special time in your life!
Remember that every woman’s experience is unique, and what works for one person may not work for another. Be patient with yourself as you find the right combination of treatments and strategies that work for your situation.
Your comfort and well-being matter, if you’re experiencing pregnancy or postpartum back pain, our team is here to help you find relief through safe, effective chiropractic care tailored specifically to your needs.
- Salari, N., Mohammadi, A., Hemmati, M., Hasheminezhad, R., Kani, S., Shohaimi, S. and Mohammadi, M., 2023. The global prevalence of low back pain in pregnancy: a comprehensive systematic review and meta-analysis. BMC pregnancy and childbirth, 23(1), p.830.
- Lisi, A.J., 2006. Chiropractic spinal manipulation for low back pain of pregnancy: a retrospective case series. Journal of Midwifery & Women’s Health, 51(1), pp.e7-e10.